<?php
use Magento\Framework\App\Bootstrap;
include('app/bootstrap.php');
$bootstrap = Bootstrap::create(BP, $_SERVER);
$objectManager = $bootstrap->getObjectManager();
$objectManager1 = Magento\Framework\App\ObjectManager::getInstance();
$directoryList = $objectManager1->get('\Magento\Framework\App\Filesystem\DirectoryList');
$path = $directoryList->getPath('media');
$state = $objectManager->get('Magento\Framework\App\State');
$state->setAreaCode('frontend');
$myarray = glob("Book1.csv");
usort($myarray, create_function('$a,$b', 'return filemtime($a) - filemtime($b);'));
if(count($myarray)){
/*This will create an array of associative arrays with the first row column headers as the keys.*/
$csv_map = array_map('str_getcsv', file($myarray[count($myarray)-1]));
array_walk($csv_map, function(&$a) use ($csv_map) {
$a = array_combine($csv_map[0], $a);
});
array_shift($csv_map); # remove column header

$message = '';
$count = 1;
foreach($csv_map as $data){
$_product = $objectManager->create('Magento\Catalog\Model\Product');
$_product->setName(trim($data['Name']));
$_product->setTypeId('simple');
$_product->setAttributeSetId(4);
$_product->setSku(trim($data['Sku']));
$_product->setWebsiteIds(array(1));
$_product->setVisibility(4);
$_product->setPrice(trim($data['MSRP']));
$_product->setShortDescription(trim($data['Short Description'])); // add text attribute
$_product->setDescription(trim($data['Long Description'])); // add text attribute
$img_url = trim($data['large_image']);

$lastWord = substr($img_url, strrpos($img_url, '/') + 1);

copy($img_url, 'pub/media/product/'.$lastWord);
$dir = $directoryList->getPath('media').'/product/';
$imgpath = $dir.$lastWord;
//echo $imgpath; die;
//$_product->addImageToMediaGallery($imgpath, array('image','thumbnail','small_image'), false, false);
$_product->addImageToMediaGallery($imgpath, array('image', 'small_image', 'thumbnail'), false, false);
//$_product->setImage($imgpath);
//$_product->setSmallImage($imgpath);
//$_product->setThumbnail($imgpath);
$_product->setStockData(array(
'use_config_manage_stock' => 0, //'Use config settings' checkbox
'manage_stock' => 1, //manage stock
'min_sale_qty' => 1, //Minimum Qty Allowed in Shopping Cart
'max_sale_qty' => 2, //Maximum Qty Allowed in Shopping Cart
'is_in_stock' => 1, //Stock Availability
'qty' => 100 //qty
)
);

$_product->save();

}
echo'sucess';
}
?>
Month: December 2017
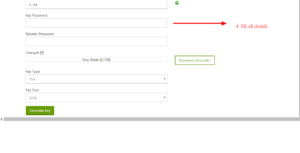
How to Generate PPK File through cpanel
For generating PPK files you need to go ist your cpanel
Go to security
click on SSH

second manage SSH Key

Generate Key

Fill Your form

Remember after import PPK your passphrase is your password
How to Use Git ?
Git is a free and open source distributed version control system designed to handle everything from small to very large projects with speed and efficiency.
Git is easy to learn and has a tiny footprint with lightning fast performance. It outclasses SCM tools like Subversion, CVS, Perforce, and ClearCase with features like cheap local branching, convenient staging areas, and multiple workflows.
Install GIT
For window:
Install GIT software from one of the below URLs.
https://git-scm.com/download/win
https://www.sourcetreeapp.com/
For Ubuntu:
sudo apt-get install git
Configure GIT account on your system
Open git command console and run two commands. Replace email and username of your git in the command.
git config –global user.email “email address”
git config –global user.name “password”
Clone GIT branch
This is the first command to initialize the project
Go to GitHub
Go to branch from where you want to clone
Click on ‘clone or download’ button
Copy ‘clone with https’ URL e.g. https://github.com/……../…….git
Create a directory on your system and go to the new directory
Run under command:
git clone https://github.com/……../…….git
GIT checkout
You can switch one branch to another branch
eg. git checkout dev[branch name]
git checkout design
GIT Add
You can add file to GIT
git add.
GIT commit
git commit -m ‘added files’
GIT Push
Push the branch on git :
git push origin [name_of_your_new_branch]
eg. git push origin dev
GIT Pull
Pull the changes from git to your system :
git pull
GIT Remove
git rm filename
Please don’t remove file or folder without git commands.
List Branches
You can see all branches created by using :
git branch
GIT Status
This is the very very useful command, so you can use this command before using any command to know exactly where are you. To heck updated code and also confirmation of which branch you stand
git status
Git command for testing with sequence
– git init
– git clone
– git checkout branch_name
– Add test file like test.txt
– git add.
– git commit -m ‘add test file’
– git push origin branch_name
– Put username and password of git when asked
– Check new added test.txt file on branch of git
Import Export Database through SSH
For Export Database through command line, you can simply use one command
Mysql -U Username -P Password DatabaseName > yourbackup.sql
Similarly, you can import database through command line
Mysql -U Username -P Password DatabaseName < yourbackup.sql

